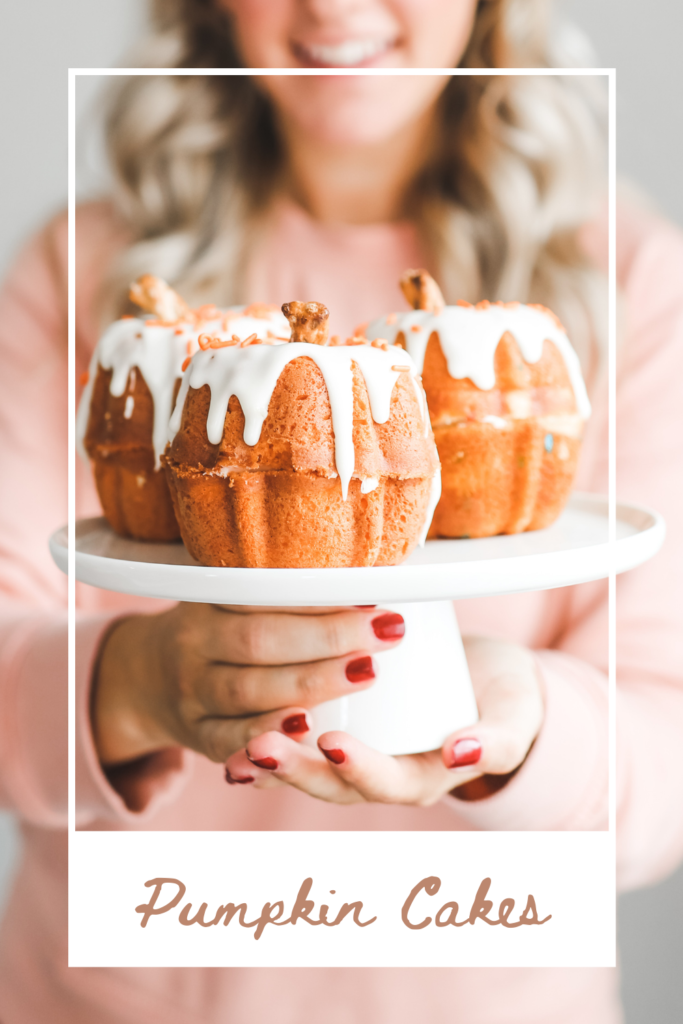
Mini Pumpkin Cakes - The Easy Way
Cute doesn’t have to mean complicated! These mini pumpkin cakes aren’t any more complicated than making a batch of cupcakes (especially with my icing hack) but give you way more “wow” factor! I first found this idea on Pinterest from a post by Martha Stewart – linked HERE. While I love a good from scratch recipe like Martha suggests, I chose to keep things easy by using a boxed cake mix with store bought icing and adding in some fall vibes with pumpkin pie spice and a bit of orange food coloring and sprinkles. These cakes are perfect for when you want to create something Pinterest worthy but don’t feel like having to break out your stand mixer. They’re also a great baking activity for kids because the assembly is so simple and flexible. Keep reading for the instructions and the ingredients list down below.
Ingredients for 6 Pumpkins
(half of a pumpkin is a great serving size so this recipe is for 6 - 12 servings)
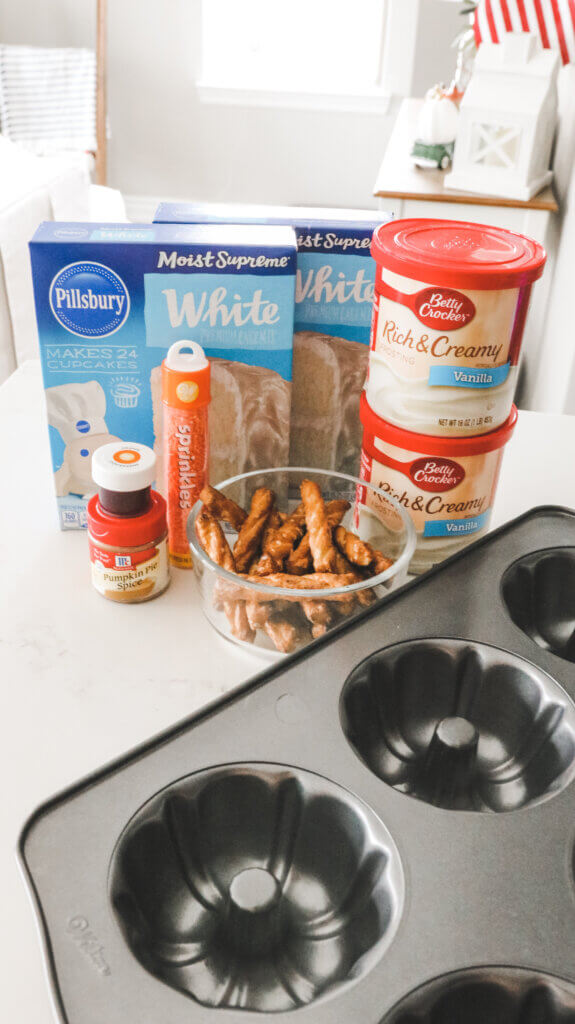
- 2 packages of boxed cake mix – I chose white and funfetti
- 1 teaspoon pumpkin pie spice (optional)
- Orange food coloring (optional)
- 1 container of vanilla icing
- 6 honey wheat pretzel sticks
- Orange sprinkles
- Spray oil
- Ingredients to make your boxed cake mix from directions on package (mine both required vegetable oil, water and eggs)
Equipment: Mini bundt cake pan – found HERE.
Instructions
This recipe is so simple that I hesitate to even call it a recipe! I used two different boxed cake mixes for variety – you could pick whichever flavors you like. I made half Funfetti flavor and the other half fall themed with the addition of pumpkin pie spice and food coloring.
I prepared both cake batters per the instructions on the packages and added 1 teaspoon of pumpkin pie spice and orange food coloring to the white cake mix to add a bit of fall into the mix. I then preheated my oven to 350 again, following the instructions on the back of the cake mix box.
Make sure to grease your mini bundt cake pan thoroughly and only fill them a little over half way with the cake batter. I then baked the cakes for about 19 minutes, the cakes are done when a toothpick can be stuck into the cake and come out clean.
When I removed the cakes from the oven I immediately tapped the pan on the stove top a few times to loosen the cakes out of the molds. I then placed a medium sized cookie tray on top of the bundt cake pan and flipped both pans over together to release the bundt cakes onto the cookie sheet. Transfer the the mini bundt cakes on to a wire cooling rack.
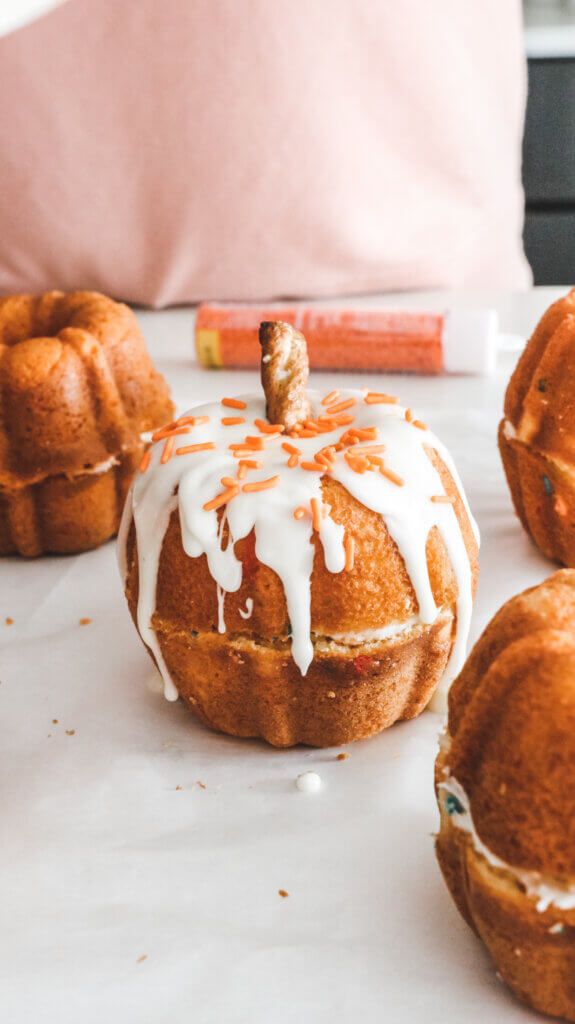
Once the cakes are cooled completely, start by slicing off the bottom of the cakes to create a flat surface where two bundt cakes can connect to create our pumpkin shape. You can save the bottoms of the cakes to create cake pops later – so don’t throw them away! Adhere two of the bundt cakes together using a bit of the frosting, lining up the ridges of the cakes. Do this for all 12 cakes to create 6 pumpkin shapes total.
Once the pumpkin cakes are assembled, break the pretzel rods into 3/4 sections, the longer sections will be used for your pumpkin stems. To begin decorating the pumpkins, microwave the remaining icing in 10 second increments until the icing moves smoothly and fluidly – about 20-30 seconds in my microwave. This is my icing “hack” to get that drizzled effect when using store bought icing!
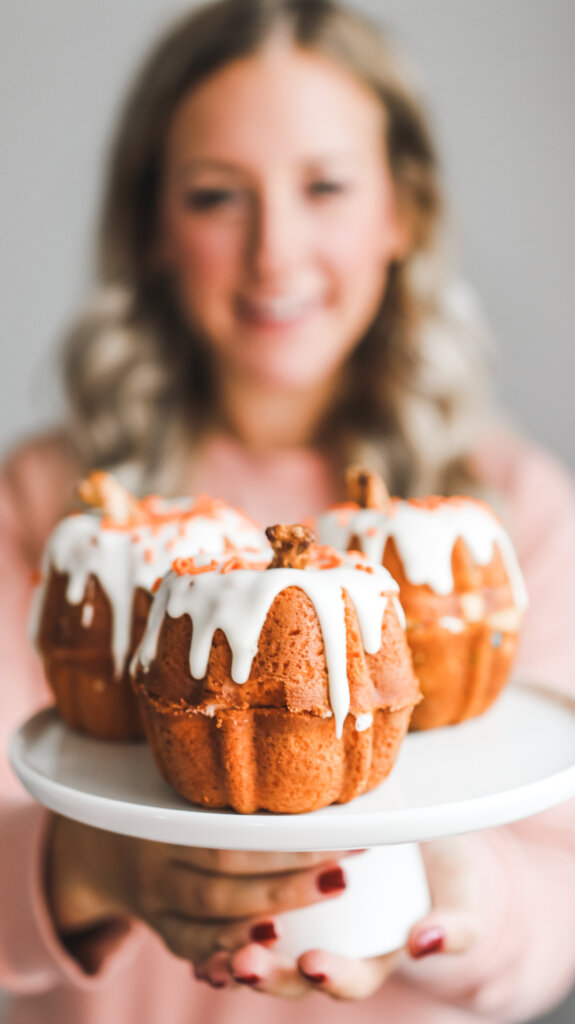
Place the assembled pumpkins on wax paper before decorating, it makes for a much easier clean up! Using a spoon or small spatula, begin to drizzle the icing around the top of you pumpkins allowing some icing to flow into the top hole of the pumpkins and over the sides. Place one of your shortened pretzel “stems” in each hole and top with sprinkles. Allow the icing to set up before serving.
Cute Treats Made Easy
The options for this recipe are endless. You could use any variation of cake mix and icing, switch up the flavors of pumpkins by using a different layered icing from drizzled icing or swap out up the sprinkles for other toppings like nuts! Brians favorite cake flavor is Funfetti and he affectionately dubbed these pumpkins “Funkins”. I hope that you have fun with this recipe this fall season and spend sometime in your kitchen creating your own Mini Pumpkin Cakes!
Find this recipe and more on my Pinterst board by clicking the photo below!

Leave a Reply